
Going Large with Easy Gazebos
When you specialise in product photography, you expect your subjects to come in all shapes and sizes and you take the rough with the smooth when it comes to prepping your shoot. A diamond ring might take the merest buff from a clean cloth to look its best, whilst a truckload of fashionable clobber means we’re breaking out the clothes rails, hangers, iron and steamer (thank God for interns!!…and thank you guys), but when we were asked to shoot a range of large pop-up gazebos for online retailer Easy Gazebos, memories of thrashing around in the mud at Glastonbury ’97, desperately searching for tent pegs we hadn’t packed for a tent we didn’t know how to put up came flooding back…
Fortunately, these beauties are actually a cinch to erect, but we wanted to provide the client with a flawlessly consistent set of images for their entire range as the final shots would be displayed side by side on their site. With various designs and 10 colours to choose from, we realised there had to be a better way to achieve that consistency than by setting up dozens of gazebos and trying to then perfectly match their positions. Mud or no mud, we were determined not to be beaten again…

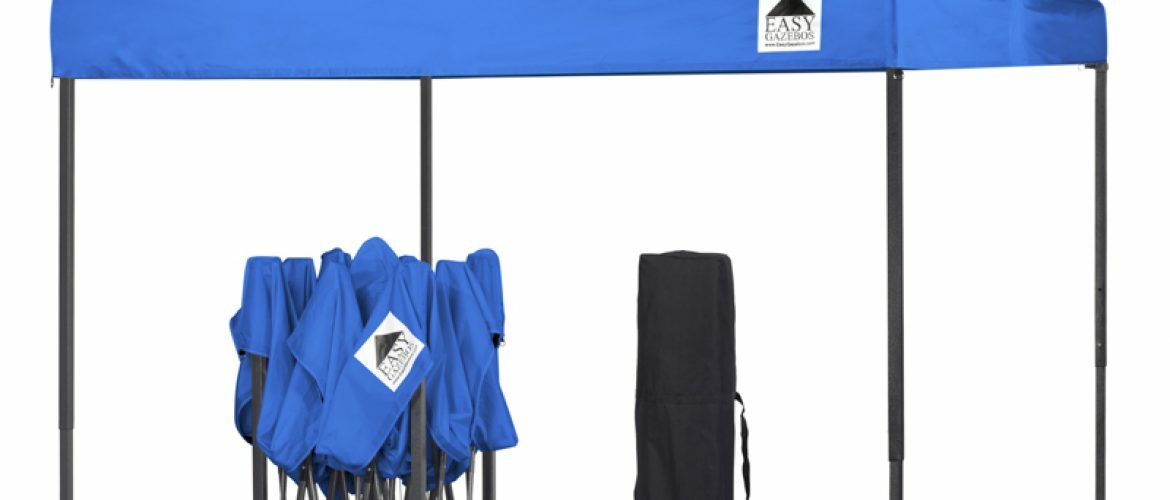
Carefully erecting just the white models in a huge rented space (we could fit the expanded gazebos in our largest studio, but the lights and camera would be positioned somewhere in the car park!!), we shot according to our brief, capturing the gazebos folded, erected, covered and uncovered, along with their packaged accessories. We used a tripod to maintain a consistent vantage point over proceedings (and counteract any shaking hands associated with flashbacks from that Glastonbury…). Once we’d covered all the angles on this default subject, we simply held up and shot panels of each of the various coloured fabrics, using the same lighting and ensuring a similar range of tonality across light and dark areas. Then we packed up, smugly confident the rest was up to our retouchers (thank God for retouchers….)
Having cut around our subject and cleaned up any unsightly creases (we know it’s a Gazebo, not a wedding dress, but these things still matter to us!), we were able to use the Colour Match tool in photoshop to substitute the colours from the different fabric panels onto the white fabric of the only Gazebos we actually shot. With only minor tweaking of white balance, luminosity and levels, we created multiple versions of the same image for our client, faithfully reproducing the different colour schemes without having to wrestle a whole herd of gazebos to life.


Whilst we frequently defer to our retouchers to best implement the post-processing, having an understanding of what’s achievable when shooting can shave a lot of time off the process….and crucially pounds off the budget. Having shot the swatches, we colour matched the client’s entire range for between £3 and £8 per image, vastly more affordable than shooting everything for real. Finally, we comped together different shots, to form a scaled image showing both the folded and unfolded gazebo with carry case…. all in less time than we spent on the phone trying to get tickets to Glasto that year!
Thanks for reading.


For a look at more of our white background product photography, visit our gallery here.
For some practical advice on best approaching a tricky shoot, check out our blog, Don’t Stress…Post Process.