
Recording actions to save time editing In Photoshop
Have you ever sat at your computer for days editing or resizing hundreds of photographs manually? If you’re looking for a way to save time and energy while achieving the same result, then look no further than the actions panel in Photoshop, which will help you keep your free time and your sanity. For any repetitive editing where you want to apply exactly the same settings to a large volume of images, Photoshops “actions” will allow you to record a set of tasks, effectively creating a preset that you can apply in a batch to as many images as you like at a time. You can even save this action so that if you create a look you’re particularly happy with, you can apply this to any future shoots. The actions panel is located in the window section of the tool bar. Click on this and you will open a separate window, which shows a series of default presets. These are included in your Photoshop package and can be used straight away without any need for recording new actions. To create a new action, you need to have an image open to work on. Once you’ve selected and opened your image, begin by making a new set or folder for the action by clicking in the icon at the top right of the window and then selecting “create new action”.


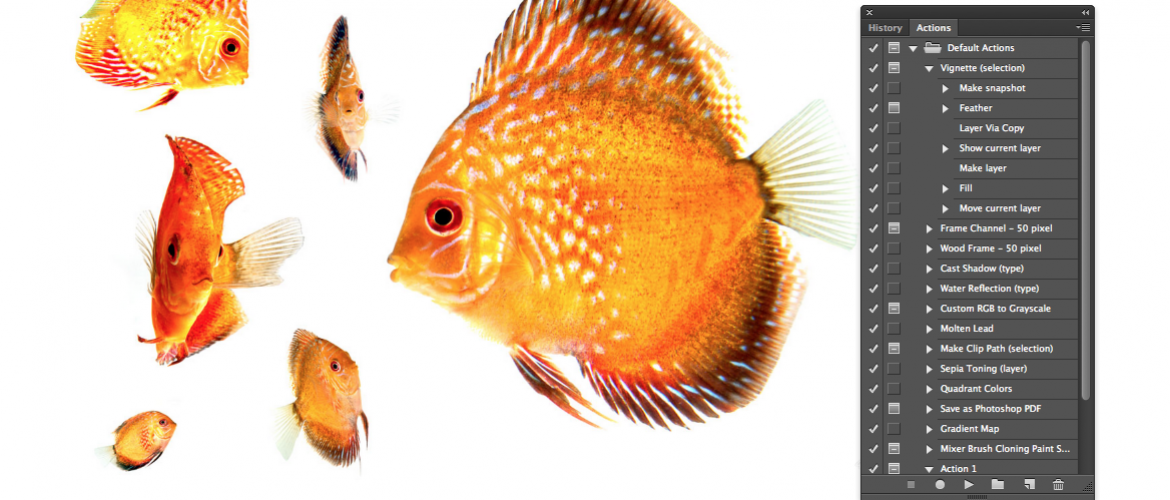
Chose a name for the set of actions you’re going to create which will be easy to recognise later, and click OK. A new action set will appear with the title you’ve chosen. Next you need to record your action. To do this, all you need is to click the top right icon on you actions window again and select “new action” in the menu that pops up. Name the action and then click ‘record’ You can then edit your image as normal, working on exposure, colour balance, curves or any other adjustments you’d like to make. Remember, if you want to apply these settings to a set of images in a batch, make sure you do not include any actions like retouching which may not translate to other images. Use of the clone/patch tools etc should in most cases be done either before or after the action you’ve recorded unless you want to retouch exactly the same spot on each image in exactly the same way. Once you’ve achieved the effect you would like click the stop button at the bottom of the actions window.


This will automatically save the presets you’ve created, under the name of the action you’ve set up. To apply these settings to a set of images, go to File – Automate – Batch. A window will pop up. Select the name of the action you want to use from the drop down menu, then select the folder of images you want to process. They need to all be saved into the same folder – anything included in this folder will have the action applied to it when you create a batch process.


If you want to save your processed images to a different folder, select this from the drop down “destination” menu. If you have included specific requests for saving in your action, leave the “override Action save as” box unchecked. You can also change how your files are named in the boxes underneath. Click the OK button and away you go! A great way to save hours of unnecessary editing, leaving you free to concentrate on the finer points of retouching your images.
Written by Beth Steddon