
Using Adjustment Layers in Photoshop
We’ve all been there. It’s 2am, it’s been a long day and you’re nearly done. You edit a final photo for contrast, colour balance and saturation and save it…. The next morning you re-open it and realise you’d obviously drunk a bit too much coffee last night. Your subject definitely wasn’t glowing orangey-green when you shot them and the clouds you thought you’d given a “subtley epic, classy” level of contrast now look like an explosion in an Instagram filters factory…..ok that doesn’t make sense, but the clouds look baaaad – what were you thinking??!
If you’ve made these adjustments directly to your main image layer, you’ll need to bin the edit, start all over and remind yourself you’re still a proper photographer – Relax; if you’d become a surgeon like mum wanted you’d be sitting bolt-upright now realising you’d left your wristwatch in a patient’s stomach! This is why it’s preferable to avoid “destructive” editing in Photoshop. Altering the pixel data of your original image irretrievably can not only lower image quality but waste time for you or a client who decides they’re not keen on the direction your edit has taken. This is where Adjustment Layers become one of the most useful weapons in your photoshop arsenal.

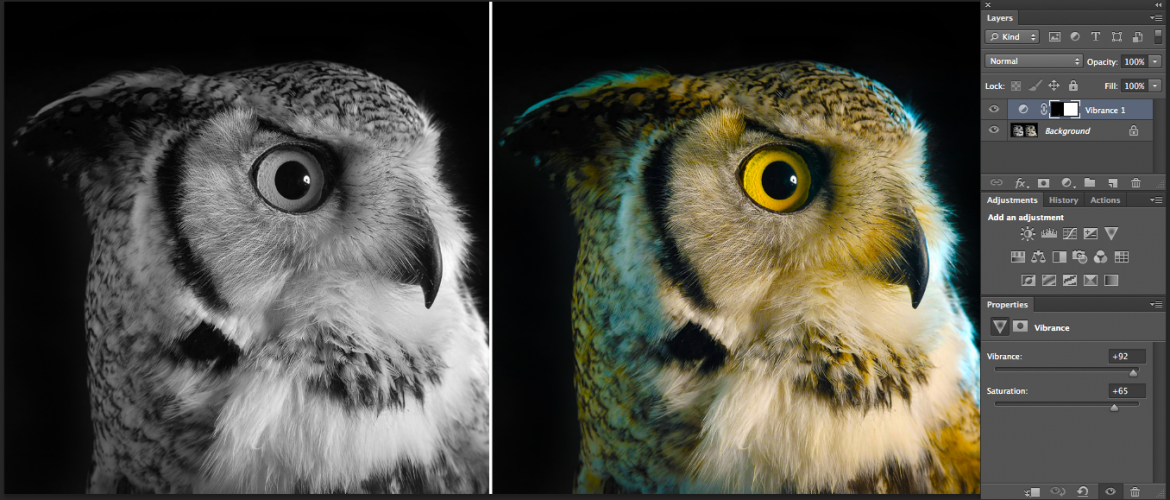
Accessible through the Layer tab, or more intuitively through the Layers pop-out window, adjustment layers allow you to edit levels, colour balance, vibrance, hue and saturation, contrast, brightness and more, without making any permanent changes. They sit at the top of your layers stack affecting the appearance of the layers below without actually altering the pixel data of your original image. Imagine you’re in Paris, staring at the Mona Lisa. Although she’s smiling, you think she looks a bit pallid. Pop your Raybans on and she’s suddenly got a lovely warm hue to her skin. You can take your sunglasses off at any point and Da Vinci’s masterpiece returns to its original form, but start daubing the canvas in self-tan and you’re going to jail buddy. Adjustment layers are those sunglasses you can pop on and off without getting a kicking from the French Police… or a disgruntled client.

As they stack up, they have an agregate effect, but can be deleted or adjusted independently of each other. You can return to an adjustment layer at any time and tweak its effects using the properties palette. Toggling the eye icon on/off on the layers palette for a given adjustment layer, you can quickly see the effect it is having on the overall appearance and by altering the opacity slider from 0 to 100% you can fine-tune the severity of an adjustment. This is especially useful when you return to an edit with fresh eyes. Those “epic” clouds which looked a bit much the morning after might have been perfect had they been done on a contrast adjustments layer you could now reign in to say, 70% opacity.

TIFF and PSD file formats retain individual layer information, including adjustment layers, so a client can potentially toggle adjustments you’ve made to a delivered file to their satisfaction or discard an adjustment layer. eg. added saturation, whilst retaining the remaining elements of the edit. It’s also possible to drag an adjustment layer from one image onto another to duplicate its effects for consistency across a batch edit.
Where adjustment layers really come into their own is in their ability to be quickly and easily masked. This means you can be extremely selective about where on the image the adjustment layer actually displays its effects. The image below has been desaturated selectively by masking off the ice-cream cone and confectionery.


Whilst the old “desaturate everything except one bit” gimmick is a generally worn-out cliche of photography, it’s used here to clearly illustrate how effective masks are when coupled with adjustment layers. The same principle will allow you to alter colours, contrast, brightness etc on selected parts of an image and you’re not limited to black and white, “on” or “off” with a mask. By altering brush opacity when painting your mask, or picking greys, there are myriad graduations you can use for the potency of an adjustment on any given pixel. At the end of your workflow, if you choose to flatten your image or save it as a jpeg, what you see on screen is what you’ll get as individual layer information is lost. However, as mentioned, storing a larger TIFF or PSD means you or a client can return at any time to make alterations to any layer.
So hopefully you can now see the benefits of adjustment layers. They allow quick and easy, endlessly editable alterations to be made to images or even just selected portions. They can be turned on or off with a single click, duplicated across sets of photos, faded to nothingness or pushed to explosively instagrammatic levels. Best of all, they’re non-destructive. Your original file remains sat at the bottom of the stack, unaltered and smiling away like the Mona Lisa, so you can save that terrible “morning after” moment of realisation for other areas of your life.
Happy snapping!