
Proportional Sizing, Image Ratios and Guides for Website Photography
When completing your booking confirmation, we need you to let us know your website’s image specification in as much detail as possible.
When we work on an image, we keep files in as high a resolution as possible. So if your final web image size is 600 x 400 px at 72dpi, we will retouch your images at 300dpi, at a ratio of 6 x 4. When we come to export your final images, we’ll then reduce the size to your final requirements.
A ratio should be specified as WIDTH : HEIGHT. If you’re not sure of your final size requirements at the time of shooting, but you know that your website product pages need images in square ratio, just specify 1:1. If you know they are landscape, ratio is likely to be 6 x 4 or if portrait, 4 x 6.
Let us know how much of the frame your image should fill. We work using guides as percentages, as this is universal across both print and web resolution images of any final size.
Amazon, for example, requires that products fill 85% of the frame. What this means, is that the top, bottom and side guides must be placed at 7.5%, and product should be large enough so that either top and bottom, or side guides are touched, as in this example. You’ll notice that there’s a very small white gradient at the bottom of the frame, as this creates the required 100% white edges that Amazon demands.

This next image shows guides at 3, 5, 10 and 20%. Use this to judge how closely you might like your product cropped, and what level you think the baseline should be – the line on which your products sit. It’s important that this stays consistent, as nothing looks worse than products wobbling about the page in a grid

The above product has a soft grounding shadow, plus reflection with a gradient to white. If displaying your product as large as possible is important, it can be better to use just a soft grounding shadow, as this means the baseline can be lower in the frame. Or of course you can use a more shallow reflection, as in the Amazon example above.
Proportional Sizing
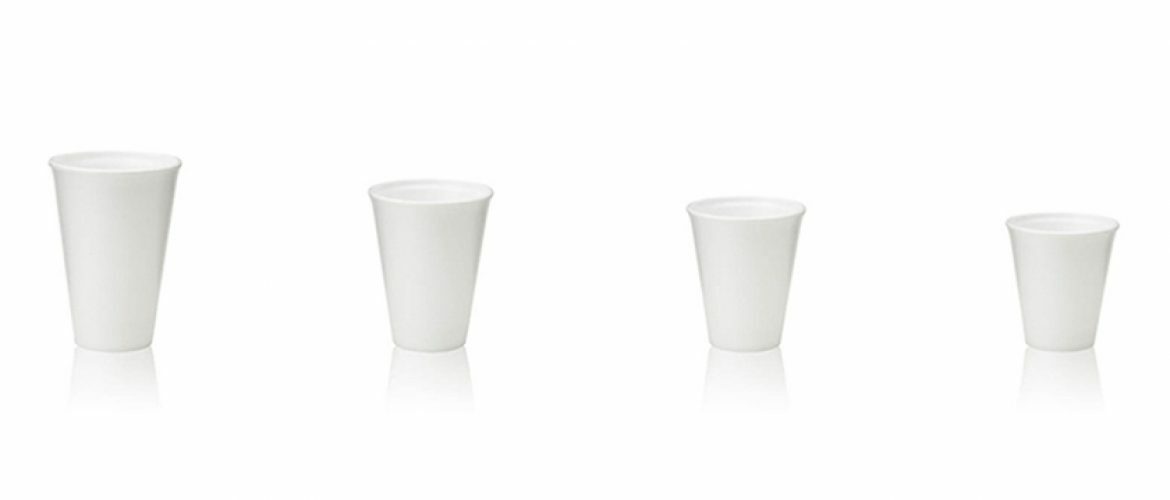
If you have a range of similar products that differ only in size, it’s useful to demonstrate this to your customers – and there’s a number of ways you can do this.
- Include a size reference in your image. This might be a pen, ruler, wedding ring, or even set of keys – just make sure you choose something that ‘s universally understood to be a certain size!

- Shoot the items proportionally to one another (not suitable for Amazon or similar listings, as you want each to appear as large as possible). Choose the largest item within a grouping, and set your image specifications (eg guides and shadows etc) based on this one. Then for the smaller items, show these in proportion (as per example below)
3. Add a measurement afterwards to clearly indicate exact size. This looks a bit naff on a a nice looking site, but for some functional products, particularly for supporting images, it can be very useful to get the maximum information communicated quickly and easily.

And if all the above just seems too boring, complicated or technical for you to bother with – send us an image that you’re happy with the positioning of, and we’ll recreate it consistently in the most sensible way.